
Over the last few years Steve built three bikes for specific journeys around the planet. The original Honda NX650 took him 90,000kms from
Australia to the Artic Circle - The XR650L was going to take him everywhere else, and the XR400M took him on an amazing adventure along the Great Dividing Range for Discovery Channel. Here you will find articles and general information about how they were built, why, and a few extra tips on the side.
“Steve’s journeys embody the true adventure of motorcycling and we are really thrilled to be able to provide him with bikes that are up to the task. He is setting an excellent example for young people through his determination, spirit and altruism, all qualities that Honda identifies with and supports wherever possible.” Tony Hinton
Honda’s General Manager of Motorcycles
|
| |
 |
 |
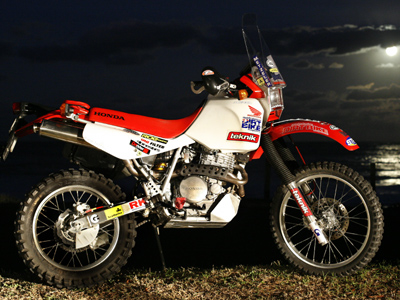
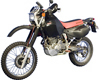
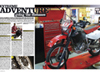
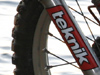
Honda XR650L LostOn/Teknik/ADB Bike - excerpts from ADB August 2006
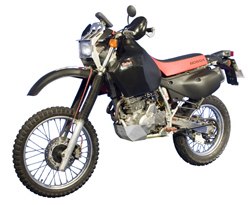
Now ... which bike to choose? - the plan has been to create the ultimate bulletproof, lightweight adventure machine; a bike that wouldn't pack it in, say, when you're strolling through the Middle East. With no race-team service truck or factory backing, I need to rely on whatever I can find along the way, so I needed a proven workhorse.
Big-arse XRs, NXs and XLs have been pounding every continent for the past 20 years,
For six months, I called upon the collective brains of the guys who've shaped off-road racing in Australia, gathering opinions on the perfects mods, with the intent of turning the XR into an indestructible weapon. Glenn Hoffman (GHR Off-road Racing Team), Nick Dole (Teknik Motorsport) and Geoff Ballard (Ballard's Offroad) all threw their hats in the ring.
|
|
Real life problems: cockpit - brakes - drive - Nick Dole
Build Philosophy
After punching out around 90,000km on a Honda NX650 over two years, through 26 countries, I learnt that reliability, mechanical simplicity and practicality are paramount.
When modifying a bike for overland adventuring, you need to rely on the parts 100 per cent; you only replace stock parts if it improves the bike and your chances of survival.
When modifying my new XR650L, availability of parts, ease of maintenance, cost, and the ability to cover any terrain were all key factors, with durability, comfort and ultra reliability being the main focus.
I was impressed by the XR's reliability even after a monkey like me wrestled with the engine. All the off-road experts agreed: the understated 650 is a detuned electric-start XR600R at heart. At its core, this bike is a lightweight bulletproof warhorse with a tough ticker. Honda four-stroke engines would have to be one of the most reliable on earth.
Return to top...
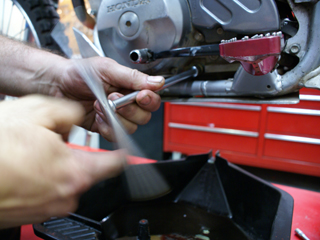
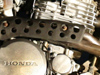
Engine
We removed the smog kit to create space, reduce weight and simplify the engine. The original paper air filter was substituted with an Australian-made Uni Filter model, and skins for better breathability, which can be removed to stave off air-filter maintenance in the middle of the jungle.
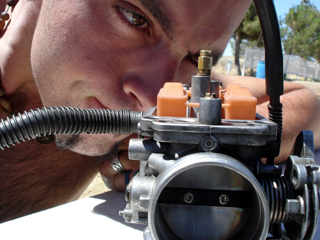
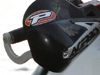
We chucked in a XR600 carby, which is smaller, lighter, harder to break and easier to adjust when it comes to jetting changes at high and low altitudes and extreme shifts in temperature. We also bolted on an XR600 cam shaft for improved mid to top-end speed and comfort. Finally, we added a Staintune exhaust, which is lighter and adds torque through the curve, as well as being bloody hard to break.
Return to top...
Brakes
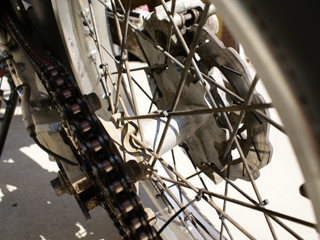
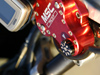
The stock braking is a little spongy. But add an extra 150kg and you have a problem. We added a specially braided Goodridge brakeline (similar to a CRF450X), which improved the braking power immensely, near-indestructible high-carbon steel Chain Gang brake discs and Silkoline Pro Race 2000 brake fluid.
This combination will provide instant progressive braking on any trail, virtually ruling out the possibility of overheating, which regularly occurred in the Andes, where, on a 320kg-plus bike, the altitude dropped from 5000m to 1000m in four hours.
Return to top...
Instruments
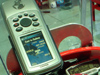
In the middle of Siberia with no one to ask for directions, let alone a road to guide you, you have to make sure you know where you're going. We added a Garmin GPS 76CX, with a removable "Micro SD" card for multiple mapping memory, which acts as an electronic compass and barometric altimeter - this lets you know when to change your jetting. We also replaced the standard dash functions with a Trail Tech endurance speedo, and installed a 12V plug, for charging electronic gear on the fly.
Return to top...
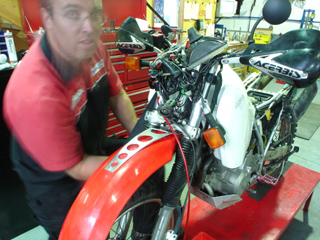
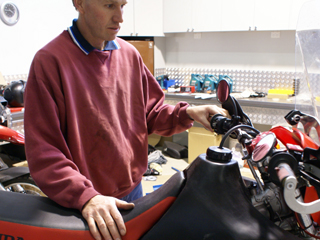
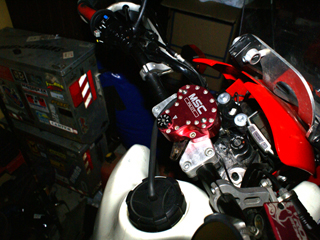
Cockpit
The addition of an MSC steering damper, with its eight settings, has made handling on dirt a piece of piss ... well, almost. It reduces fatigue and, in the event of, say, sideswiping something, stabilises control, as well as making for a more comfortable ride. We threw on some Acerbis PHS tapered handlebars, which, I reckon, wouldn't break unless you fell off a cliff, and heated handgrips - cold handles equates to bad handling, plus they're heavenly when your balls are chattering like marbles in -20°C winds. As an absolute necessity, we added an Acerbis 21-litre tank, which will carry you almost 400km. We decided to keep the standard seat, given that my butt is the same shape as it.
Return to top...
Chain and Gearing
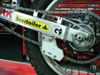
We combined laser-cut Chain Gang sprockets with an RK 520 GXW chain and a Scottoiler MK7 universal kit (an automated chain oiler) to create a chain set-up that could potentially last three times longer than a conventional system. We also wrapped a Lube Tube chain-oil reservoir around the top of the fuse/battery box - minimising the need to check or adjust your chain for a few thousand kilometres, as well as providing flawless operation and maximum life expectancy. We have also added a tooth to the rear sprocket, shifting the ratio to 15/46, and will carry a spare 14-tooth front for tighter dirt sections. Staying close to the original gearing set-up helps to maintain the bike's overall economy.
Return to top...
Protection
To provide the XR with some all-round protection, we added Acerbis Multiplo Touring handguards, to protect the levers and my hands, Rocstompa Pro Stompa footpegs and an impenetrable Whipps bashplate, and, lastly, Ballard's XR headlight protectors, which are as tough as they come.
Return to top...
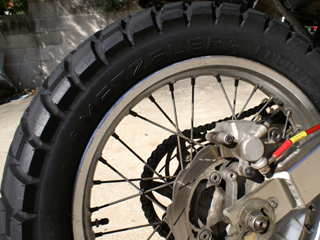
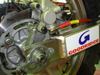
Suspension and Tyres
The front-end was pretty soft, so the Teknik guys rebuilt the standard fork and rear shock to near-perfection for the 320kg-plus (no, I'm not that large) payload. These were modified because you'd have bugger-all chance of replacing them in the middle of Africa. The addition of heavy-duty springs - front and rear - and some serious revalving now has the XR handling perfectly down rocky trails without concern. We opted for Metzler Karoo tyres and tubes. The tyres feature a light reinforced carcass structure that wears well on-road, allowing you to grip with ease, on sand or tar.
Return to top...
Extras
We threw on older-style XL600
lenses and inserted a Phillips Xenon/HDL H4 conversion kit,
which helped stretch headlight visibility out to around 65m, and
a custom extra-high screen. Finally, we added an Acerbis
shock flap and fork boots, to protect the suspension, and a
Rocstompa fuel
cap, to ensure the fuel cap could be removed after a potential
tank expansion, or a contraction from an extreme change in temperature.
Return
to top...
XR650L:
real-life problems
Cockpit:
To make space and simplify the cockpit, we had to remove the standard
dash, leaving five pre-wired bulbs dangling. We used one to hook
up a lamp for 24-hour dash visibility. Leaving a perfect place to
mount a GPS,
and Trailtech Speedo.
The high/low heated grip switch was mounted here too. We wrapped
the clutch, throttle brake/speedo cable and electrical wires with
spiral tape. The last thing you want to do is find out you are 200kms
from target with 20kms of fuel left! The nice people from Aqualine
Industries who make a variety of tanks for most modern dirt
bikes have offered to make a special custom tank for the XR650L
to increase fuel range and ensure I don't get stuck in the middle
of the Sahara.
Brakes:
The XR650L has better brakes than any other production
XR. Why? The NX650 255mm front disc is standard - 240mm is stock
on every other XR. That said, it's still not up to the task of mountain
descents in somewhere like the Andes with 320kg on board. The lack
of feel at the lever comes from the rubber brake hose, which we
replaced with ADR-compliant braided stainless-steel units from Goodridge.
We also fitted long-wearing Chain
Gang discs, while retaining stock Honda
pads; Silkolene
Pro Race 2000 fluid fills both ends. Why didn't we use bigger
discs? They're vulnerable to crash damage, and if a disc is bent,
it's easier to get your hands on NX650 discs.
Drive:
This engine has origins from the mid-'80s, and in that
time minimal changes have been made - a testament to its original
design. If you had to name one weakness, though, it's in the gearbox.
With its tall road gearing, the abundance of torque at low rpm,
delivered in pulses from the 100mm piston, and ample traction on
tar roads, the gearbox can wear out prematurely. We fitted a rubber
cushion drive hub from the NX650 to help remove some of the
road shock, and ended up going for 18-inch rims - it's easier
to find tyres for 18s than 17s.
Return
to top...
|

Nick Dole, the proprietor
of Teknik Motorsport in Sydney, can list Honda and Yamaha among
his customers for their Australian Safari efforts. He was able
to guide the XR project and give sound reasons for modifying,
replacing or leaving stock parts alone.
"When ADB asked if I wanted to be part of this project it stirred
my interest, as Crombie did the first leg [ of the trip
- 100,000km ] unsupported," says Dole. "So it's a unique
opportunity to help someone build a bike that can be repaired
economically on the road.
"Assisting him in his endeavour to raise awareness for youth
suicide is certainly a world away from our Pro Lites race team,
and from the suspension tuning core of the business. It's a
great cause." |
NICK
DOLE - Teknik
Motorsport
|
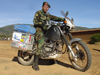
Steve
Crombie’s LostOn adventures take him and his bike around
the world and into some primitive and scary places. For most
of us, reliability is important. For Steve, it’s a matter
of survival. He’s recently built his next adventure bike,
a Honda XR650L, with Nick Dole of Teknik Motorsport. Here’s
Nick’s top 10 tips for a bike’s survival off the
beaten track.
|
1.
OIL
Basic engine care 101. How many times have you heard the saying
“oil is cheap, engines aren’t” Even with today’s
high quality oils, the high level of contaminants and heat generated
from single cylinder engines gives the oil a work-out. Oil change
intervals of 3000km should be considered your maximum if you
ride a single, and don’t forget to check the oil before
every ride. If you are desperate use any oil, even cooking oil,
to get you home. |
|
2.
AIR FILTERS
With a lot of dual sport bikes coming out with paper filters,
it’s wise to fit a washable foam element or oiled cotton
element if you are doing long dirt miles. The stock paper filters
will load up with dust, making the engine run overly rich. Bang
them on a rock if you need to unblock them, but no too hard!
The oiled foam filters are easy, if not a bit messy to wash.
They are however great protection from a wrecked engine full
of dust. Some resealable plastic bags for a fresh filter and
some disposable gloves will make the chore a whole lot easier |
|
3.
WHEELS AND SPOKES
Wheels can go unnoticed, as most people ignore them until it
all goes wrong. Spoke tightening can be a little tricky, and
is out of the scope of a 2 sentence “how to”. However,
running a spanner over the spokes will do no harm, just remember
spokes need to be firm, not tight, and tighten in a maximum
of 1⁄4 turn increments for each spoke. Cable tie the cross
of the spokes together so if you break one it won’t puncture
the tube. Same goes for broken spokes. |
|
4.
TANKS
For adventure riding most bikes will need a bigger tank. Some
things to keep in mind when shopping for a tank. Keep the weight
as low on the bike as possible, and as close to the steering
head as possible. It makes for much better bike control if it
all gets out of hand. Fuel pumps are just another thing to break,
so avoid them if you can. The Aussie made RV Aqualine tanks
(www.rvaqualine.com.au) are our personal favorite. If you puncture
a tank you can either make a fire and get handy with some makeshift
plastic welding or grab a cake of soap out of your bag to plug
a hole. |
|
5.
TOOLS
Essential tools (to carry) will allow you to remove the seat
and tank, front and rear wheels, plus tyre levers and a means
to repair punctures. Tyre changing is easy with good levers
and some practice. Most guys who are good at tyre changes are
only too pleased to show off, get them to show you how it’s
done, or buy them a beer at the pub if they change yours!. Stuff
grass in the tyre carcass if you don’t have a spare tube,
it will get you back to civilization if you ride carefully.
Using heavy duty tubes like the Bridgestone Ultra HD’s
will probably lessen your chances of getting a flat in the first
place. If you lose a bolt and don’t have a spare, look
for things on the bike that could pinch a bolt off, like a horn
or a stand. Besides your basic kit you could also include a
Chain Breaker; bicycle pump; clutch cables; accelerator cable;
spare jets (if varying altitude more than 3000m); brake pads;
air filter skins; fuel filters; spare spokes |
 |
6.
DRIVE
A long lasting drive chain and sprockets is worth the investment.
A high quality X ring chain will be around the $150 mark, but
worth it when you team it up with some super long lasting steel
sprockets, like the ones from The Chain Gang (www.chaingang.com.au).
Keep the chain lubed with a mini aerosol or a Scottoiler (www.scottoiler.com) |
|
7.
BRAKES
With a lot of extra weight on board, don’t neglect the
brakes. Most dual sport bikes are marginal on brakes, so some
quality Goodridge hoses (www.johnstamnas.com) and oversize front
disc will keep braking distances safe. Change the fluid every
12 months, or more often if it overheats. There are no substitutes
for brake fluid, don’t put oil in there, it wrecks the
seals |
|
8.
GEAR RACKS
The same rules for tanks apply to panniers. Keep them close
as practicable to the centre line of the bike and keep the weight
low. The higher and further out fit is, the more of a pendulum
effect fit will have when you get sideways. Inspect the pannier
mounts every few days, looking for broken bolts and fatigue
cracks. Have some pliers on board for the fencing wire that’s
scattered around this great nation. Resist the temptation to
cut a cocky’s fence. |
|
9.
DAMPERS
Steering dampers have become very popular in the last 10 years
with good reason. They require minimum maintainence and make
long rides more comfortable. Check the mounting bolts regularly.
Buy a good brand with a solid reputation, like MSC (www.mscproducts.com.au)
|
|
10.
SUSPENSION
Setting the suspension up for you and the weight you carry on
the bike will make the journey a joy. Have a reputable suspension
tuner service the forks and shock annually and talk to them
about upgrading the springs, as all bikes are under-sprung if
you load them up with panniers and big tanks. Teknik’s
a reputable tuner, go see them (www.teknikracing.com) |
 |
|
|
|
|
Return to top...
|
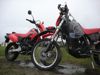
THE BATTLEBIKE
1999 Honda NX650 (Dominator)
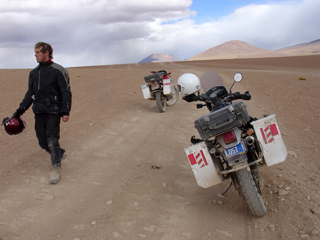
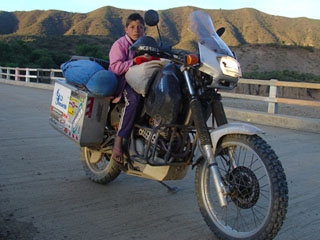
I left the burial zone of Che Guevara in Valle Grande (Bolivia) in the morning. As the sun was setting two kids began their mountain descent, each with a bag of potatos for their respective families. They had a good ten kms to go. One of them
was lucky enough to hitch a ride.
SELECTION
What bike to choose...there are so many out there on the market. If money and resources weren't an issue, we would build one from scratch. But unfortunately there are bills to pay and mouth's to feed, so this option may have to wait a few years…like maybe ten years.The first part of bike preparation was choosing which bike. This may sound strange, but it took Lost on Earth 14 months to decide on their bike. Once this was done, three bikes were purchased in two weeks (Thanks to Peter Stevens Motorcycles and Online Motorcycles.) |
|
|
Things considered when purchasing a bike (most are fairly obvious)
were:
Reliability - one of the most important for good reasons
Reputation - is it a good make Cost - we have a pretty tight budget
Weight - the lighter the better
Ease of maintenance
Power and available torque
Design of bike - what was it built for
Mechanical simplicity
Fun factor - can we thrash it
Availability of parts
Ease of modification
Running on low grade fuel - we want to go to Africa
Looks - is it prone to theft
Plastic fantastic - will it easily break
After all these things were taken into account, the Honda NX 650
Dominator was selected, for its reputation, simplistic build, bottom
end power, ability to do wheelies and availability of parts.
Return to top...
MODIFICATIONS
Acerbis
23
Litre tank for greater range (400kms+, after a few months in
the heat it has now expanded to 26 litres)
Fully tapered PHS Evolution handlebars were
some of the best we could find. Steve flipped his bike on a particularly
enticing dirt run. The bike landed perfectly upside down on the bars
with no problems. However the front side of his bike did cave in.
Tomma has had various accidents, involving his bike flying many metres
in the air, and damaging various parts of his bike, especially his
now mongy looking crash-bars but never his handlebars!
Extra strong Acerbis Rally Pro Handguards for
hand and bike protection (wider front giving greater protection from
a cold wind - The new Rally
II handguards are awesome)
Rally Pro
Spoilers which attach to the top end of your handguards for extra
protection from wind, rain and mud.
The Chain Gang
Heavy duty steel, laser cut front
and rear sprocket (530 pitch conversion - normal 520). Used in
Australian Safari races.
RK Chains
Heavy duty top of line gxw 530
chain. This way you don't need to carry a spare. Can last almost
100,000kms if you look after it.
Scottoiler
Automatic
chain oiler - Scottoiler is by far the best product on the market
that we could find)
Whipps
Bash plate for
the underside of your bike. Protects your engine from damage when
riding over trees, gutters, locals, dogs and the like. We used a
modified Honda XR650 bash plate.
Progrip
Motocross grips -recommend
cross-dual grips, good all-rounder. After 25,000kms still hanging
in there.
Pelicase
Top
box for
easy access. One of the strongest plastic boxes on the market. Waterproof,
dustproof and airtight. Nothing can get in) We use them to house
all electronic equipment. Recommend that you do not use pick and
pluck foam to house your gear. After six months it starts to fall
apart if you use it regularly. Try to work on an appropriate design
layout then cut out of one solid piece of foam -longer lasting.
Bernard Tesch
German made Tesch-Travel-Tasche 4 Aluminium 49
litre panniers Awesome boxes. We´ve had many stacks and
bent the shit out of our boxes. Every time we wacked them back into
shape with a hammer in a few minutes. They are narrower than our
handlebars, which assists with handling and they fit everything we
need for a three year journey. They are lower than usual so be careful
when grinding (sparks flying) your rear foot pegs on good tar roads.
Some of the toughest fully waterproof boxes on the market, which
act as guards if you have an accident A bit of silicone around the
lid edge and lock helps for really heavy weather.
Mr Eckert (now retired legendary German ex-racing mechanical maestro)
Pannier rack system to attach panniers and top box (this system is
home made, utilising some of the best overland travel knowledge lent
by Eckert at Rennsport) Crash bars for greater protection. They can
be used to attach jerry cans at the front for better weight distribution.
Chivo´s
Reconditioned rear shock - worked for extra heavy duty loads.
Return to top...
Other
High plastic screen to improve aerodynamics and battering from
wind and elements.
Handlebar risers are well worthwhile if you are
over 5"10. This includes all of us. We are currently getting
some aluminium custom risers made in Bolivia. Can't wait. Sick of
riding like a hunchback over sand.
New paint scheme (original colours
are lame) we definitely need to give the bikes a refurb this makes
the bikes distinct and easier to track if they may happen to go missing...
which they won't)
Electrical socket to recharge batteries and power
various appliances Improved seat (extra padding for the bum will
definitely come in handy) I wish I had done this earlier. My arse
is now specifically shaped for Dominator seats. I often wonder if
I will ever have a normal arse again.
All moving parts are kept standard. All these modifications are on
the outside, making our ride just a little bit more comfortable.
Do not kid yourself that this can be done quickly. The most time
consuming process was the selection of the bike. Deciphering which
pieces could work with the bike, and how to create the best 'battle
bike' for our trip. Finding the parts was often difficult. Deciding
on how to enhance the bike took many months of research. Then we
needed to 'get to know the bike'. Sleeping with it, nurturing it,
talking about it in your sleep (Bogga). We gave ourselves six months
to fiddle with the bike, ride the bike in all available conditions,
and nurture the bike into what it is today.
Rebuilding the bike will also play its part. While this has not yet
been done, we expect at least 60,000 kilometres before we do any
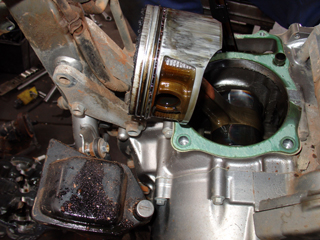
work. (Steve scored his piston after 32,000kms. His oil overheated
and dried up on a particularly treacherous run. An Oil temperature
gauge can come in very handy.) We expect the cam chain to be the
first to go, but when this happens we are likely to do a full top
end rebuild (Steve's cam chain was rooted when he cracked open the
engine to check the status of his piston and rings, also got a new
one at 32,000kms). Then on to the next 60,000 km's..... And be ready
for just about anything to go wrong (cause I bet you, it usually
does)!
***Four months into the trip Steve removed his front side panels.
Annoying pieces of plastic with no purpose. After many off-road battles
they had cracked many times. Lends itself a Mad-Max stylin'look.
Return to top...
|
|


